Setting Up Intergrations
Link the AI Agents in Admin portal
Section titled “Link the AI Agents in Admin portal”After the agent is approved and goes live, it should be connected to the app for monitoring performances and tracking usage. One client can have multiple agents.
- Go to Client’s Site and navigate the client the agent needs to link
- Edit the client
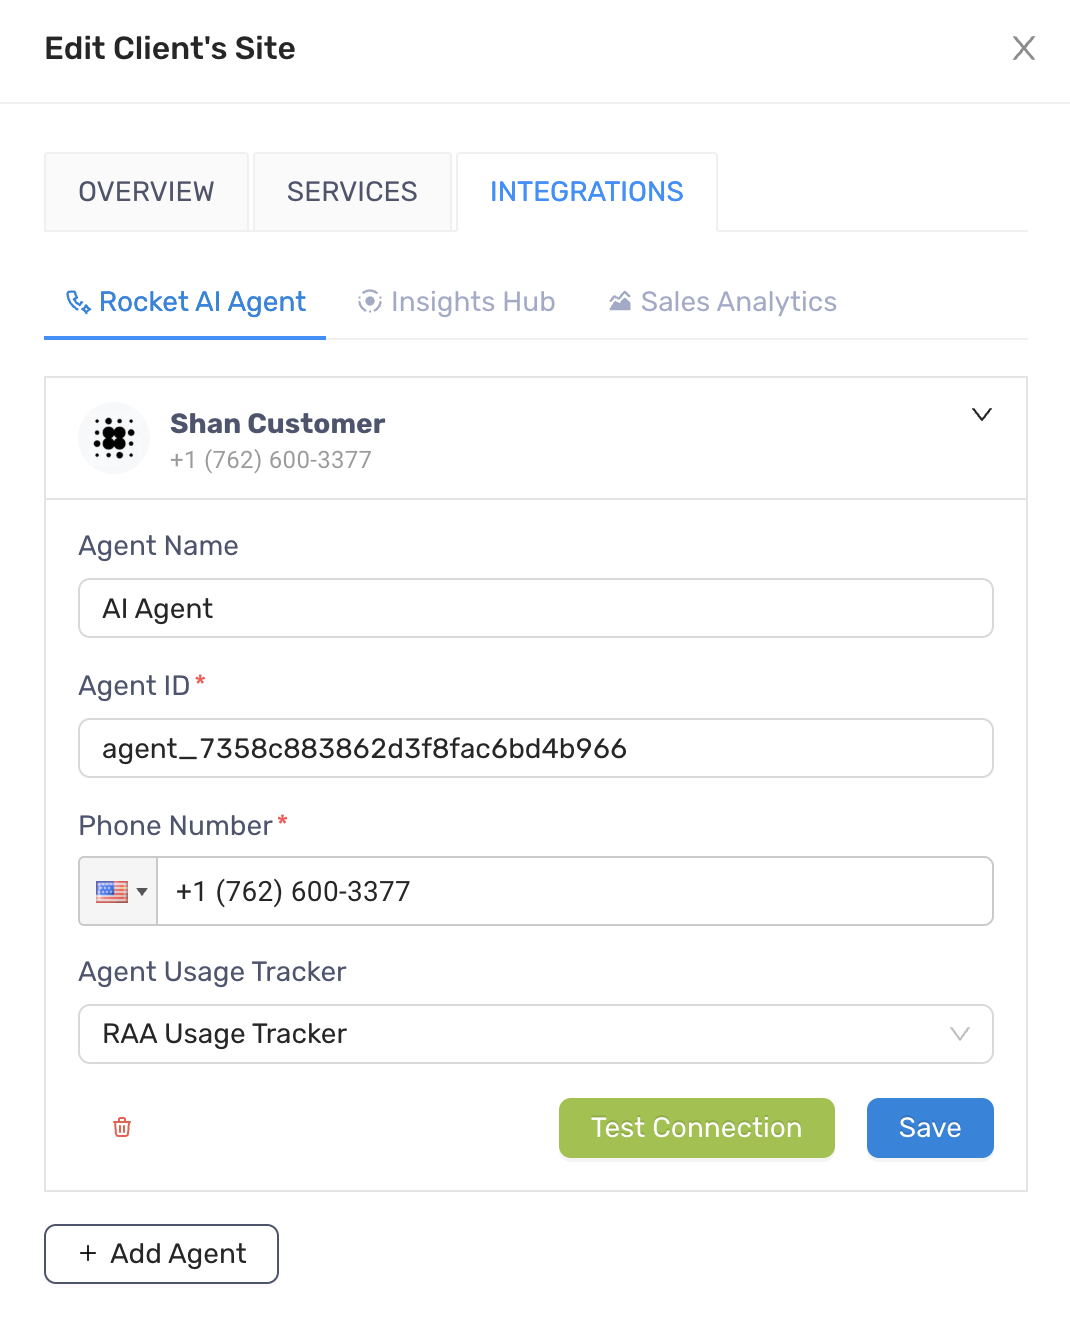
- Click Integrations tab > Rocket AI Agent tab
- Click “Add Agent” button
- On the accordion, enter values for:
- Agent Name: the same name as one on Retell AI, you can still have a different name
- Agent ID: the agent ID from Retell AI
- Phone Number: the phone number linked to the agent
- Agent Usage Tracker: the meter on Stripe for tracking the usage
- Click “Save” on the accordion to finish
Locate the agents on client’s site
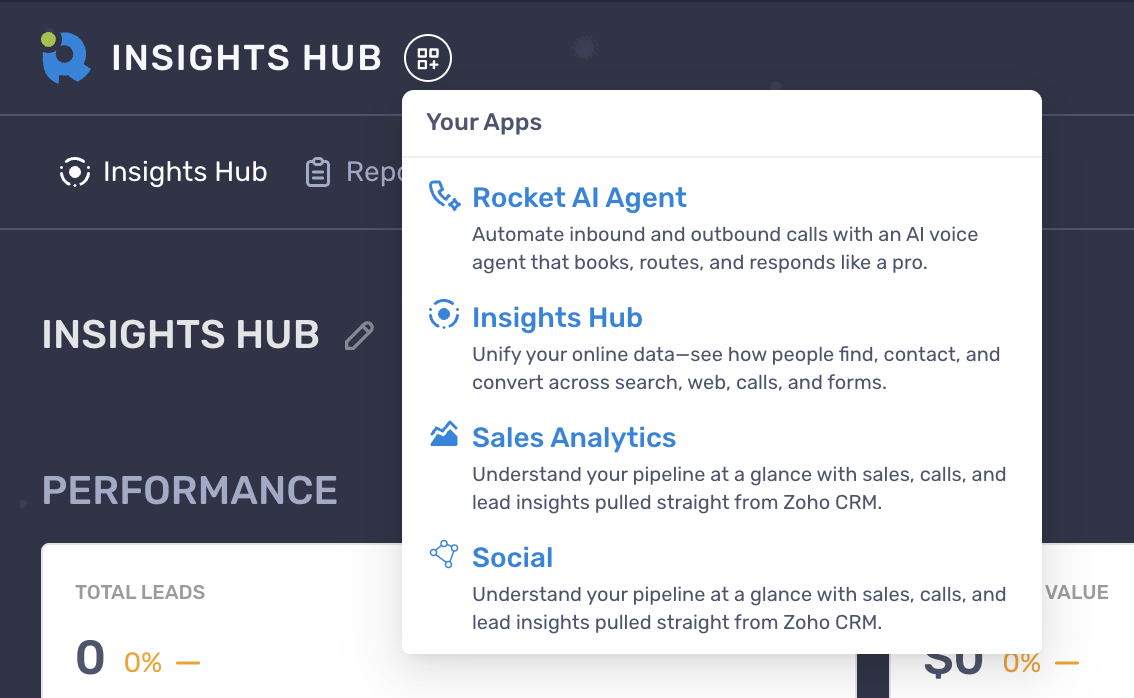
Section titled “Locate the agents on client’s site”- Once the agents are linked in the Admin, go to the client’s site and select Rocket AI Agent from the service list.
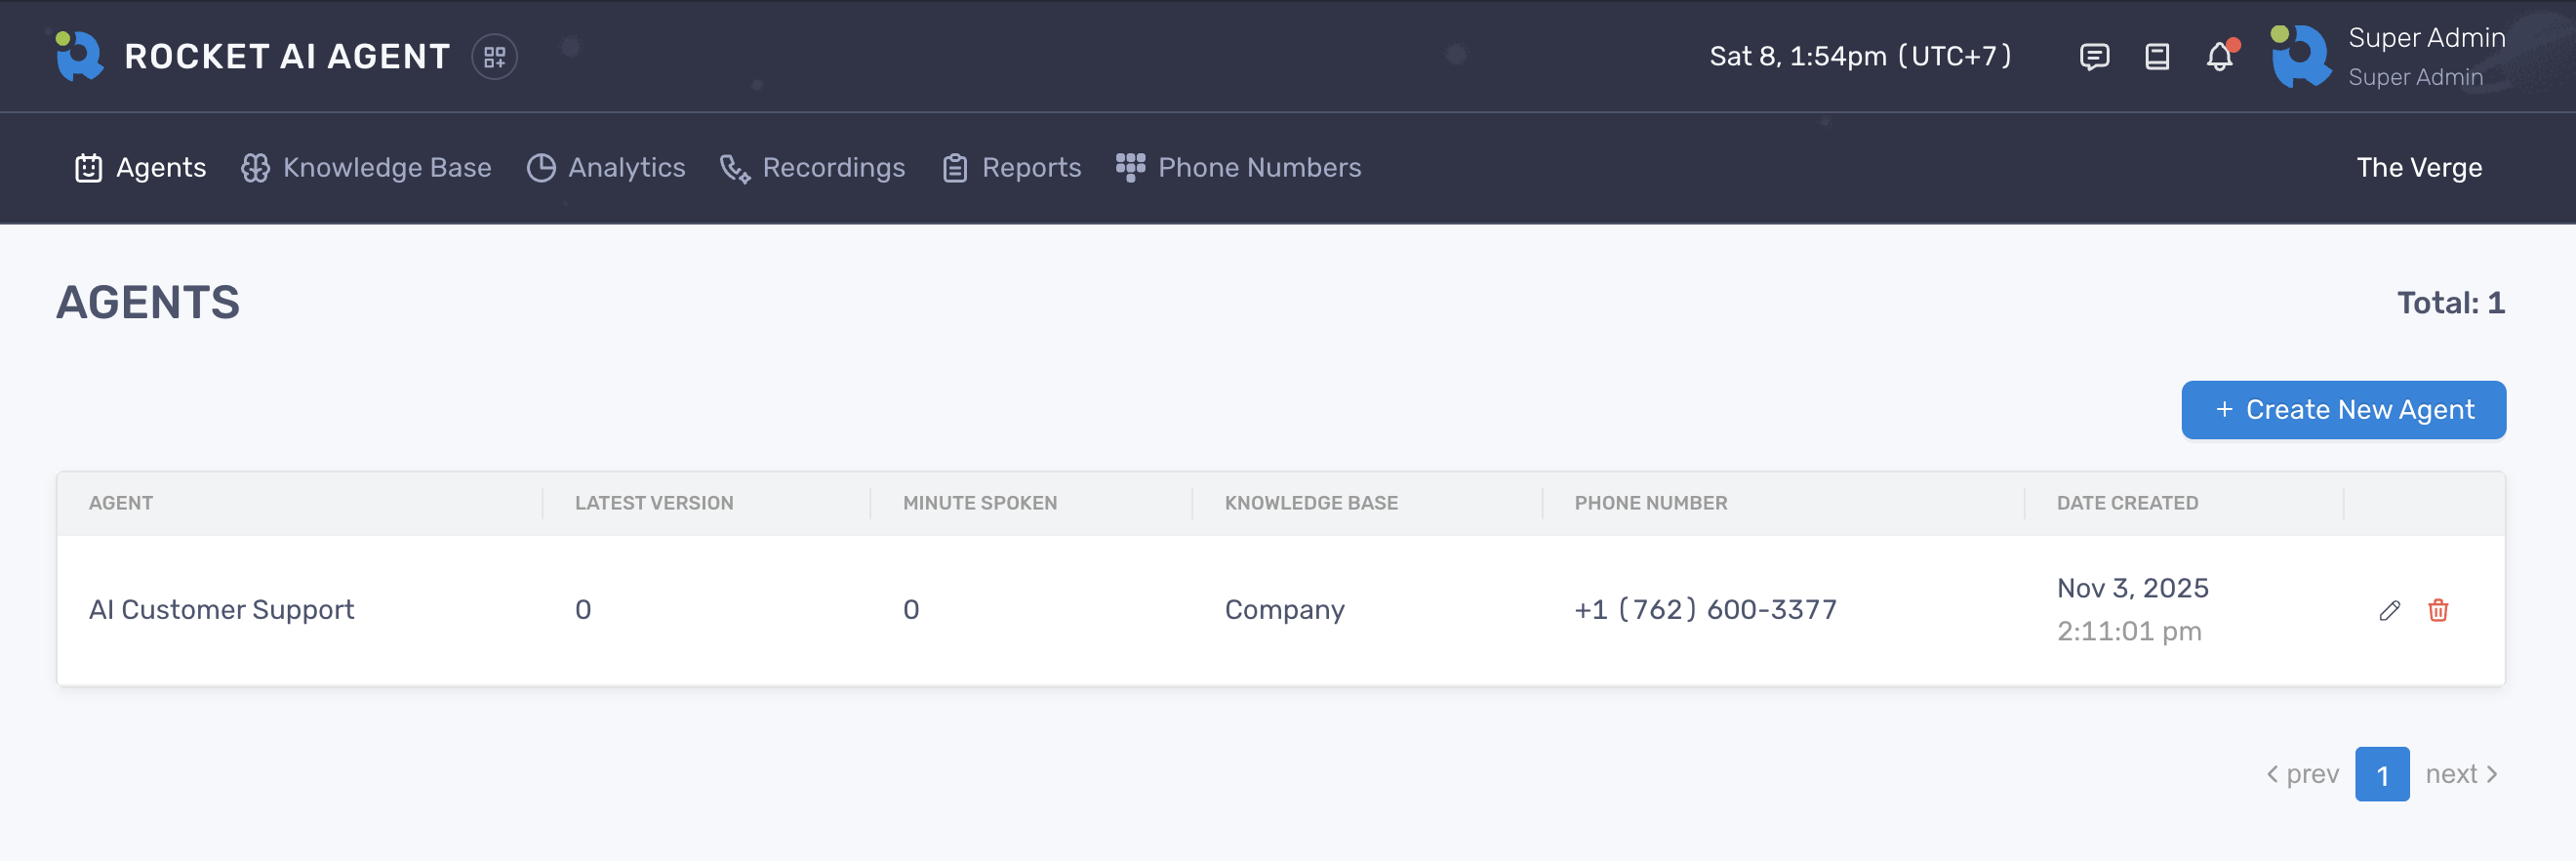
- Click “Agents” on the top menu
- You’ll see the list of linked agents there.
Connect Zoho CRM
Section titled “Connect Zoho CRM”- When you’re on the Agents page, locate the agent you want to connect and click Edit icon button
- Navagite the Actions section and select any of the Create Lead, Create Contact, Create Task.

- On the Add Action modal, click “Connect Account” button
- You’ll be redirected to the Zoho login screen for authenication
- Log in with Zoho account and select the organzation designated for that client
- Grant RocketLevel the access and permissions
- You’ll then return to the Add Action modal

You can see the connected Zoho account on the CRM Account dropdown field.
Set up Twilio SIP Trunk
Section titled “Set up Twilio SIP Trunk”The agent can only be assigned to Twilio phone number via the Elastic SIP Trunk. Read more on SIP Trunk by Twilio
Create SIP Trunk
Section titled “Create SIP Trunk”- Log into the Twilio Console https://www.twilio.com/login
- From the main Dashboard on the left side of the screen, select (…) for All Products & Services
- Scroll down to Elastic SIP Trunking and click it
- From the Elastic SIP Trunking Dashboard, click the “Get Started” button
- From the Get Started with Elastic SIP Trunking page, Click the “Create a SIP Trunk”
- Enter values on the required fields then click “Create”
Configure SIP Trunk
Section titled “Configure SIP Trunk”Create SIP Trunk
Section titled “Create SIP Trunk”- One the SIP Trunk above is created successfully, select “Termination” on the left side menu
- In the Termination SIP URI edit box, enter a unique termination URI
- Click the red plus (‘+’) next to Credential Lists to create a new Credential List. This will be used to challenge requests to your Termination SIP URI
- In the “New Credential List” provide a Friendly Name for the Credential List. You can have multiple credentials that allow communications with your SIP termination URI.
- Enter a username and a password, then click “Create”
Add phone number to the SIP trunk
Section titled “Add phone number to the SIP trunk”You’ve almost done here. Once the trunk is created, you still need to link a phone number to it in order for the agent to use it.
- On the Elastic SIP Trunking dashboard, click on the friendly name of the SIP Trunk to which you want to add the number
- On the left sidebar menu, locate and click the “Numbers”
- Select the number to link it to the SIP trunk. If you don’t have one, click “Buy a Number”
After the 2 steps, collect the following details as they will be needed for later in RocketLevel
- Termination URI
- Credential: username, password and nickname (or friendly name)
- Phone number
Set up Cal.com account
Section titled “Set up Cal.com account”The agent will use Cal.com to check the availability and book appointment for the client. The account creation in Cal.com should be easy and straight forwards. After that, you will need to generate an API key in the account. API key allows agents to book appointments on behalf of the account.
Steps to generate the API key:
- Log into te Cal.com account
- Click on the drop-down menu beside the account’s name.
- Click on the “My Settings” label.
- Scroll down to the Developer section and click on “API keys.”
- In the upper right-hand corner of the screen, click the button marked ”+ Add.”
- Name your API key and set its expiry date.
- Click the “Save” button.
- Once an API key is generated, immediately copy the key as you won’t be able to see this code again later.
If you misplace this code, you can delete the API key or create a new one. There’s no limit to the number of active API keys you can have. You can always return to this area of your account to review your active API keys.